https://codelabs.developers.google.com/codelabs/webrtc-web/#6
7. Set up a signaling service to exchange messages
In this step, you'll find out how to:
- Use npm to install project dependencies as specified in package.json
- Run a Node.js server and use node-static to serve static files.
- Set up a messaging service on Node.js using Socket.IO.
- Use that to create ‘rooms' and exchange messages.
Node.js, Socket.IO를 활용하여 데이터를 교환하기위한 처리를 한다고 합니다.
Concepts
WebRTC를 유지하기 위해서는 metadata를 교환해야 한다고 합니다.
1. Candidate
2. 해상도, 코덱 같은 미디어 정보를 제공하는 Offer와 Answer 메시지
오디오, 비디오 스트리밍 전에 metadata의 교환이 필요합니다. (시그널링)
이전 장에서는 sender와 receiver가 동일한 페이지에 있었기 때문에 시그널링은 단순히 오브젝트에 메타데이터를 전달하는 것을 끝났습니다.
실제 어플에서는 다른 웹페이지에서 기기가 실행되며 metadata를 교환할 방법을 찾아야 합니다.
이를 위해 시그널링 서버를 사용하며, peer간 메시지를 전달할 수 있습니다.
Prerequisite: Install Node.js
In order to run the next steps of this codelab (folders step-04 to step-06) you will need to run a server on localhost using Node.js.
You can download and install Node.js from this link or via your preferred package manager.
Once installed, you will be able to import the dependencies required for the next steps (running npm install), as well as running a small localhost server to execute the codelab (running node index.js). These commands will be indicated later, when they are required.
About the app
WebRTC uses a client-side JavaScript API, but for real-world usage also requires a signaling (messaging) server, as well as STUN and TURN servers. You can find out more here.
In this step you'll build a simple Node.js signaling server, using the Socket.IO Node.js module and JavaScript library for messaging. Experience with Node.js and Socket.IO will be useful, but not crucial; the messaging components are very simple.
Choosing the right signaling server
This codelab uses Socket.IO for a signaling server.
The design of Socket.IO makes it straightforward to build a service to exchange messages, and Socket.IO is suited to learning about WebRTC signaling because of its built-in concept of ‘rooms'.
However, for a production service, there are better alternatives. See How to Select a Signaling Protocol for Your Next WebRTC Project.
이 예제에서 서버코드는 index.js에서 실행이 되며 클라이언트는 webapp에서 실행이 됩니다.(index.html)
Node.js앱은 두 가지 테스크를 가집니다.
첫번째로 메시지 전달을 가집니다.
socket.on('message', function (message) {
  log('Got message: ', message);
  socket.broadcast.emit('message', message);
});
두번째로 WebRTC video chat room을 관리합니다.
if (numClients === 0) {
  socket.join(room);
  socket.emit('created', room, socket.id);
} else if (numClients === 1) {
  socket.join(room);
  socket.emit('joined', room, socket.id);
  io.sockets.in(room).emit('ready');
} else { // max two clients
  socket.emit('full', room);
}
우리의 단순한 webRTC앱은 2개의 peer까지 허용합니다.
HTML & JavaScript
Update index.html so it looks like this:
<!DOCTYPE html>
<html>

<head>

  <title>Realtime communication with WebRTC</title>

  <link rel="stylesheet" href="css/main.css" />

</head>

<body>

  <h1>Realtime communication with WebRTC</h1>

  <script src="/socket.io/socket.io.js"></script>
  <script src="js/main.js"></script>

</body>

</html>
You won't see anything on the page in this step: all logging is done to the browser console. (To view the console in Chrome, press Ctrl-Shift-J, or Command-Option-J if you're on a Mac.)
Replace js/main.js with the following:
'use strict';

var isInitiator;

window.room = prompt("Enter room name:");

var socket = io.connect();

if (room !== "") {
  console.log('Message from client: Asking to join room ' + room);
  socket.emit('create or join', room);
}

socket.on('created', function(room, clientId) {
  isInitiator = true;
});

socket.on('full', function(room) {
  console.log('Message from client: Room ' + room + ' is full :^(');
});

socket.on('ipaddr', function(ipaddr) {
  console.log('Message from client: Server IP address is ' + ipaddr);
});

socket.on('joined', function(room, clientId) {
  isInitiator = false;
});

socket.on('log', function(array) {
  console.log.apply(console, array);
});
Set up Socket.IO to run on Node.js
In the HTML file, you may have seen that you are using a Socket.IO file:
<script src="/socket.io/socket.io.js"></script>
At the top level of your work directory create a file named package.json with the following contents:
{
  "name": "webrtc-codelab",
  "version": "0.0.1",
  "description": "WebRTC codelab",
  "dependencies": {
    "node-static": "^0.7.10",
    "socket.io": "^1.2.0"
  }
}
This is an app manifest that tells Node Package Manager (npm) what project dependencies to install.
To install dependencies (such as /socket.io/socket.io.js), run the following from the command line terminal, in your work directory:
npm install
You should see an installation log that ends something like this:
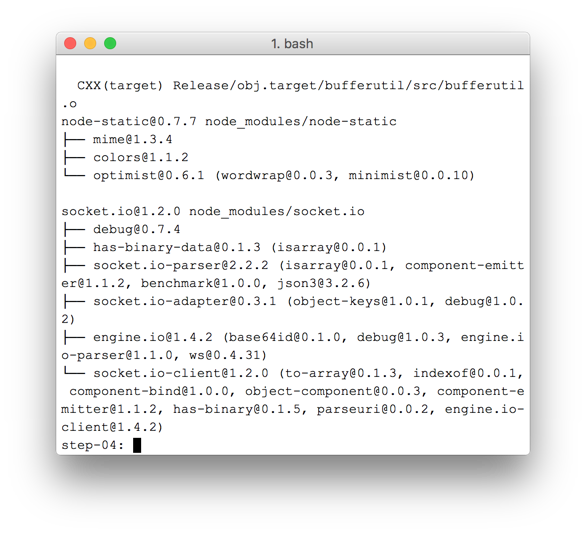
As you can see, npm has installed the dependencies defined in package.json.
Create a new file index.js at the top level of your work directory (not in the js directory) and add the following code:
'use strict';

var os = require('os');
var nodeStatic = require('node-static');
var http = require('http');
var socketIO = require('socket.io');

var fileServer = new(nodeStatic.Server)();
var app = http.createServer(function(req, res) {
  fileServer.serve(req, res);
}).listen(8080);

var io = socketIO.listen(app);
io.sockets.on('connection', function(socket) {

  // convenience function to log server messages on the client
  function log() {
    var array = ['Message from server:'];
    array.push.apply(array, arguments);
    socket.emit('log', array);
  }

  socket.on('message', function(message) {
    log('Client said: ', message);
    // for a real app, would be room-only (not broadcast)
    socket.broadcast.emit('message', message);
  });

  socket.on('create or join', function(room) {
    log('Received request to create or join room ' + room);

    var clientsInRoom = io.sockets.adapter.rooms[room];
    var numClients = clientsInRoom ? Object.keys(clientsInRoom.sockets).length : 0;

    log('Room ' + room + ' now has ' + numClients + ' client(s)');

    if (numClients === 0) {
      socket.join(room);
      log('Client ID ' + socket.id + ' created room ' + room);
      socket.emit('created', room, socket.id);

    } else if (numClients === 1) {
      log('Client ID ' + socket.id + ' joined room ' + room);
      io.sockets.in(room).emit('join', room);
      socket.join(room);
      socket.emit('joined', room, socket.id);
      io.sockets.in(room).emit('ready');
    } else { // max two clients
      socket.emit('full', room);
    }
  });

  socket.on('ipaddr', function() {
    var ifaces = os.networkInterfaces();
    for (var dev in ifaces) {
      ifaces[dev].forEach(function(details) {
        if (details.family === 'IPv4' && details.address !== '127.0.0.1') {
          socket.emit('ipaddr', details.address);
        }
      });
    }
  });

});
From the command line terminal, run the following command in the work directory:
node index.js
From your browser, open localhost:8080.
Each time you open this URL, you will be prompted to enter a room name. To join the same room, choose the same room name each time, such as ‘foo'.
Open a new tab page, and open localhost:8080 again. Choose the same room name.
Open localhost:8080 in a third tab or window. Choose the same room name again.
Check the console in each of the tabs: you should see the logging from the JavaScript above
코드를 이해하기 위해서는 Socket.io에서 사용하는 room 처리 방식 및 client, server callback 등록에 대한 학습이 필요했다. 특히 javascript의 메소드 이름을 통해 callback을 지정하는 방식이 많이 낯설었고 room 관련 api도 공부해야 한다.
두번째
Message from client: Asking to join room yumin
main.js:31 Message from server: Received request to create or join room yumin
main.js:31 Message from server: Room yumin now has 1 client(s)
main.js:31 Message from server: Client ID dp1ExkI65PzFAIQ6AAAE joined room yumin
Bonus points
- What alternative messaging mechanisms might be possible? What problems might you encounter using ‘pure' WebSocket?
- What issues might be involved with scaling this application? Can you develop a method for testing thousands or millions of simultaneous room requests?
- This app uses a JavaScript prompt to get a room name. Work out a way to get the room name from the URL. For example localhost:8080/foo would give the room name foo.
What you learned
In this step, you learned how to:
- Use npm to install project dependencies as specified in package.json
- Run a Node.js server to server static files.
- Set up a messaging service on Node.js using socket.io.
- Use that to create ‘rooms' and exchange messages.
A complete version of this step is in the step-04 folder.
Find out more
- Socket.io chat-example repo
- WebRTC in the real world: STUN, TURN and signaling
- The term ‘signaling' in WebRTC
Next up
Find out how to use signaling to enable two users to make a peer connection.
Socket.io 사이트를 들어가봤는데 채팅 어플 개발로 좋은 예제가 있어서 나중에 추가적으로 공부할 예정이다.
'프로그래밍' 카테고리의 다른 글
| [Flutter, C#] .env 파일 추가 (1) | 2023.10.23 |
|---|---|
| Redis란 무엇인가? (0) | 2023.08.24 |
| 안드로이드 스튜디오 빨간 줄 나올 때 (0) | 2022.04.11 |
| 3. gRPC 코어 컨셉과 설계, 라이프 사이클 (0) | 2022.04.10 |
| 2. gRPC Dart 샘플 프로젝트 설치 (0) | 2022.04.10 |


댓글